Overview
Objects in Unify have attributes, which are like fields or columns. Every attribute has a value type which defines what kind of values it contains. Attributes can be used throughout Unify, such when creating plays or personalizing emails. There are no limitations on the number of objects or attributes you can create. However, we recommend creating separate objects for each distinct data source to keep data organized.Create an attribute
Creating attributes can also be done via the
API, which may be convenient for
developers who prefer to programmatically define many attributes at a time.
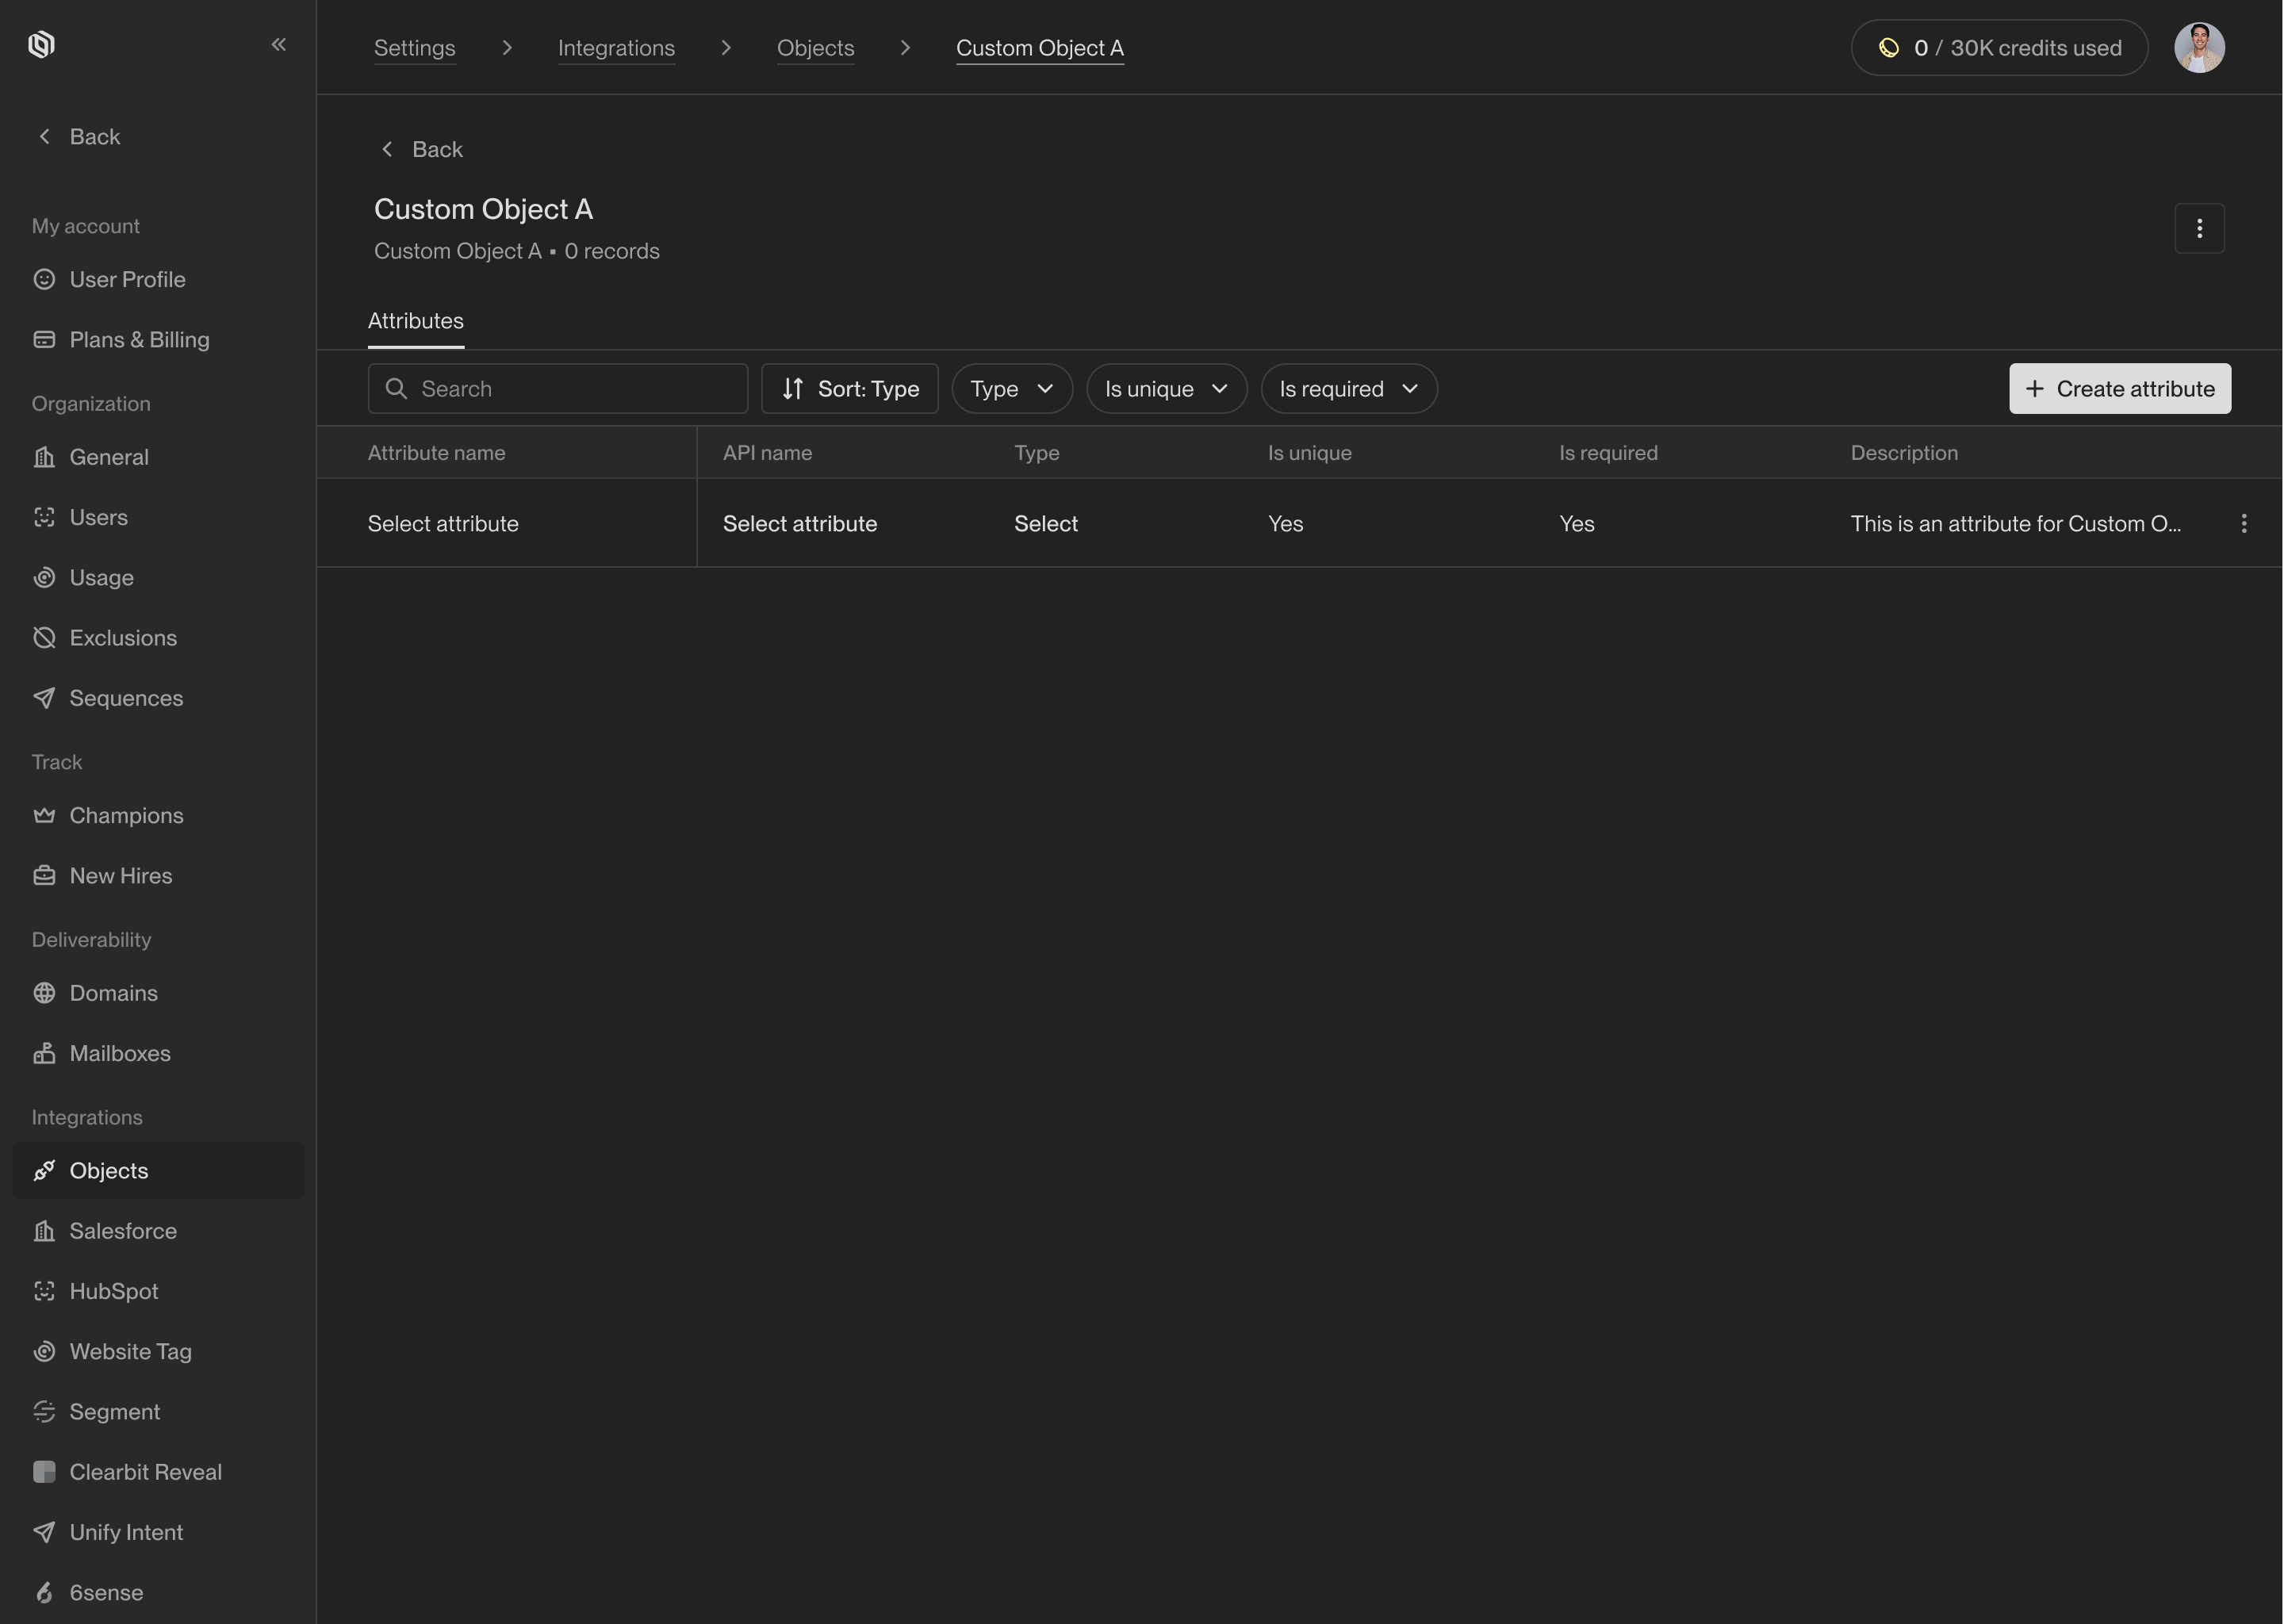
Open the object settings page
Navigate to Settings -> Objects
and select the object you want to create an attribute for.
Provide attribute details
On the attribute creation screen, you will need to provide several pieces of
information which define how the attribute will work: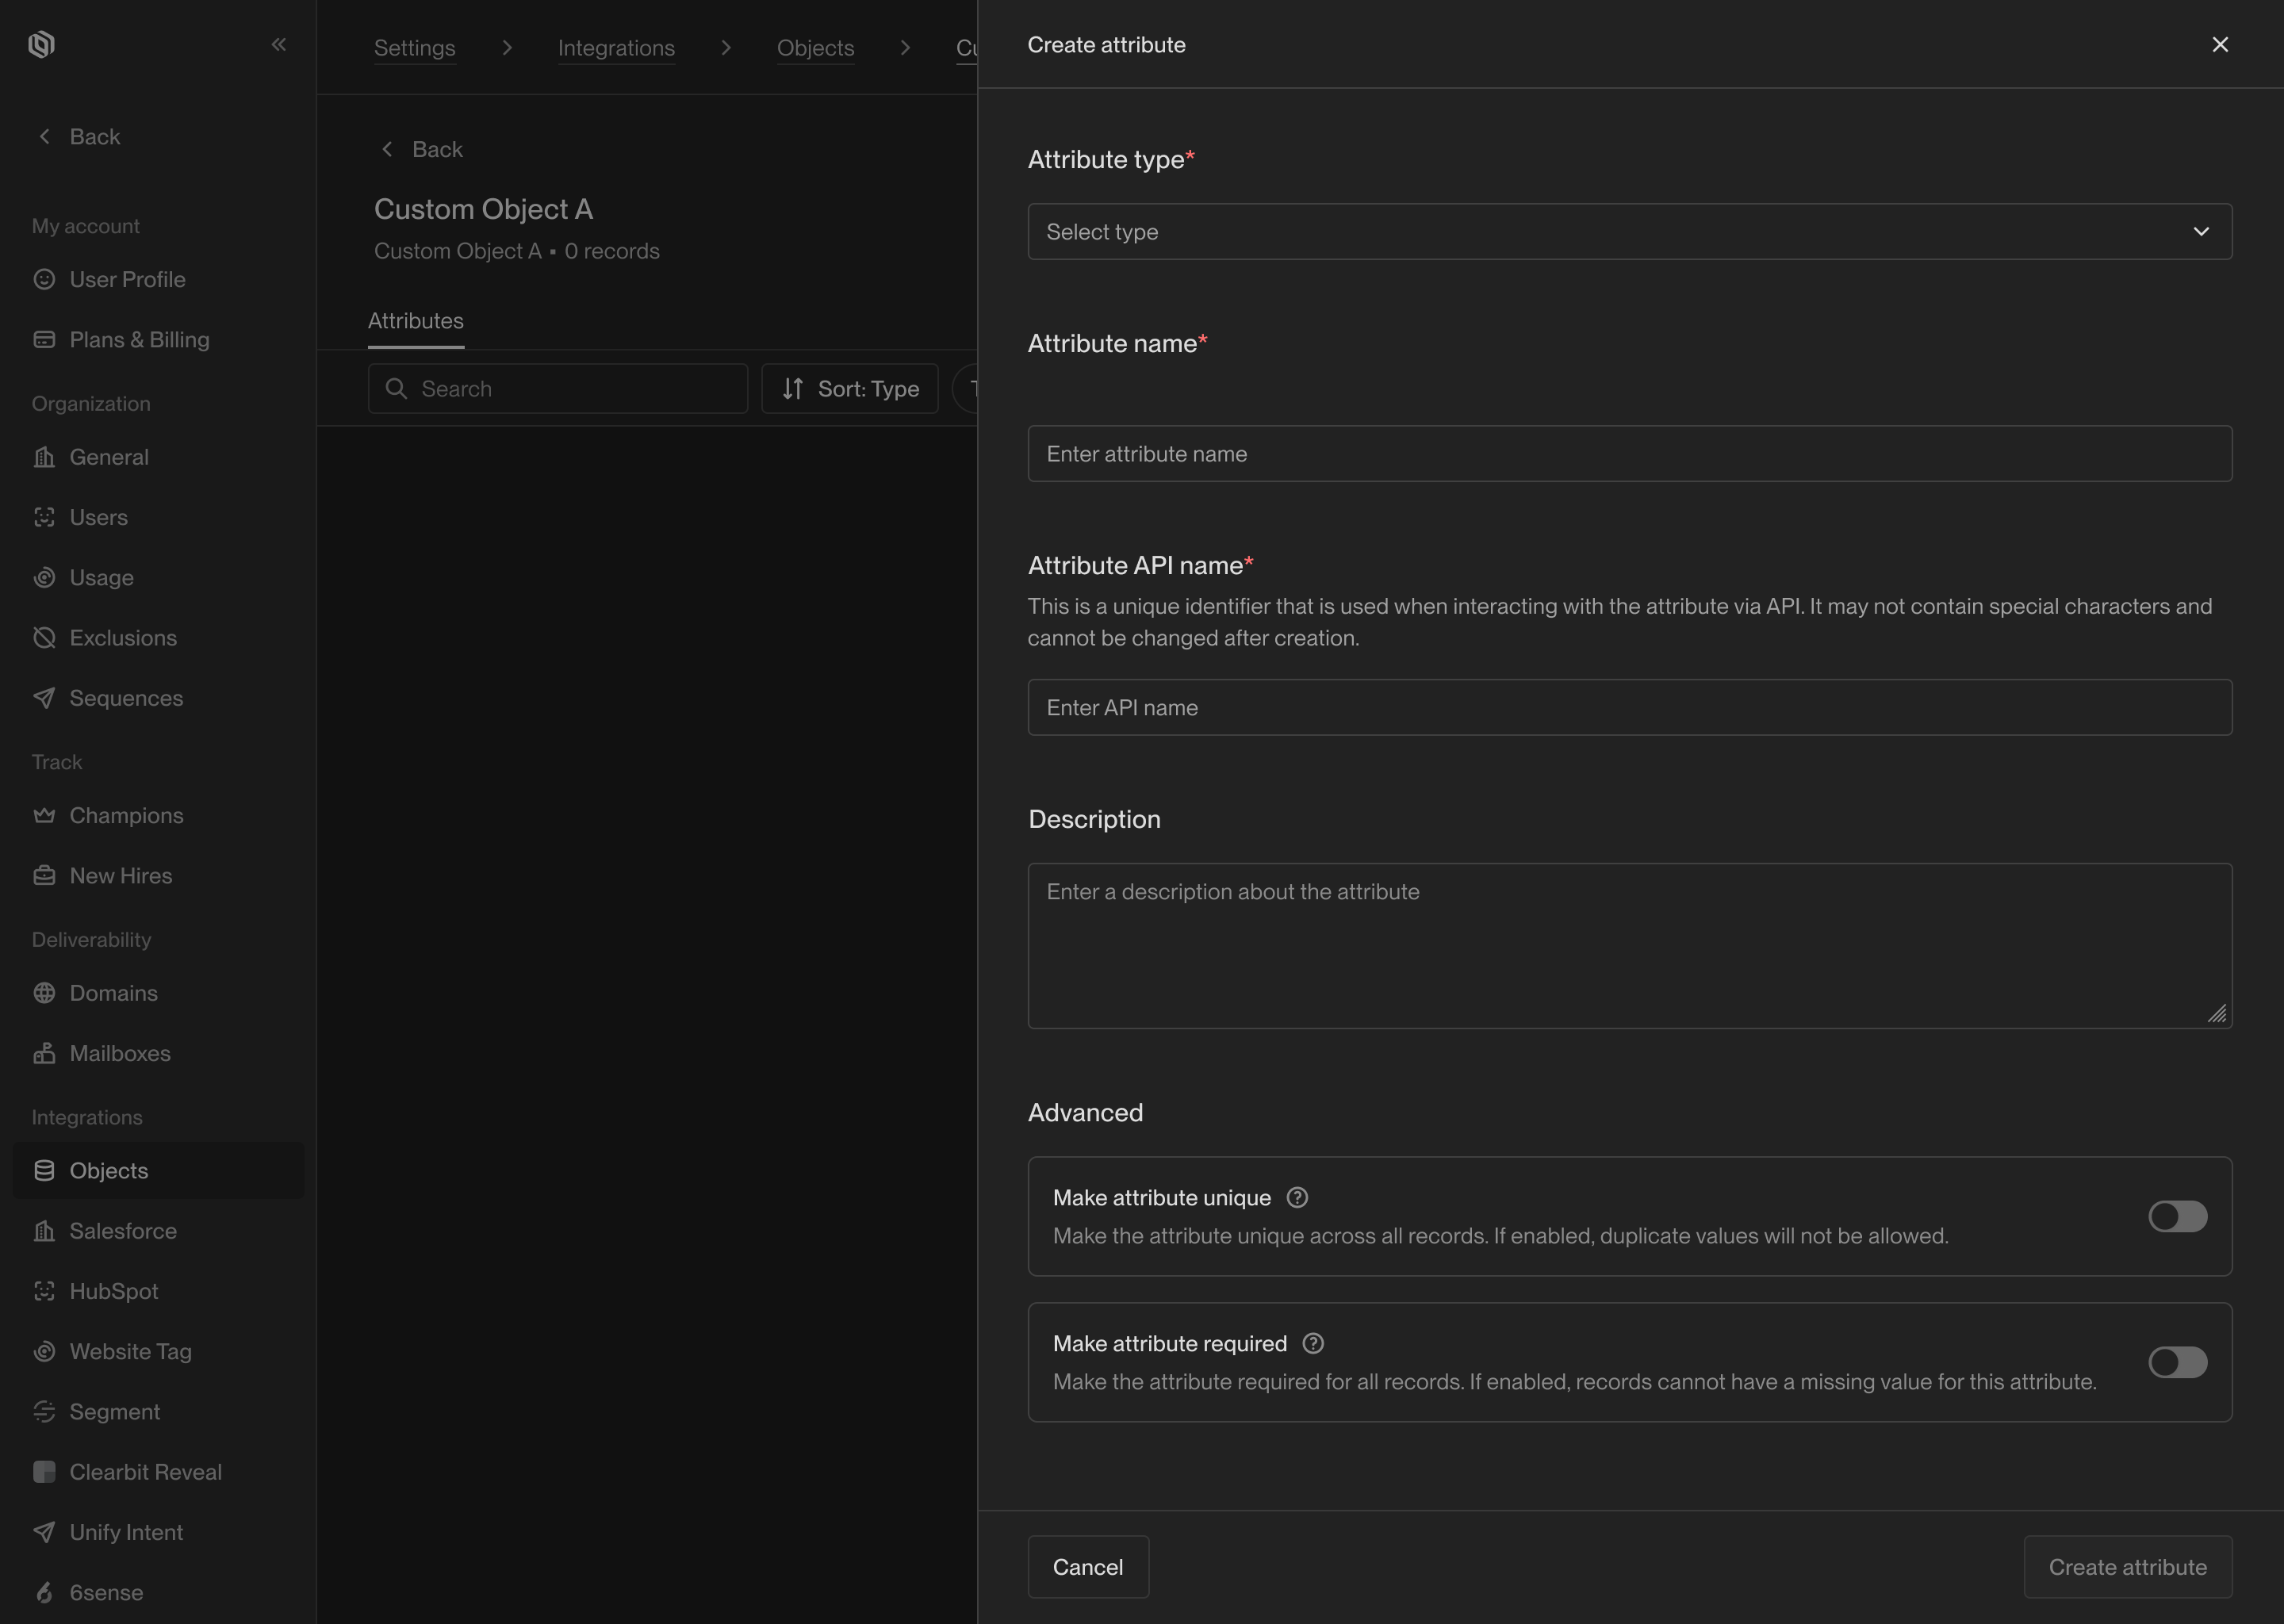
- Attribute type — The value type for this attribute. See Attribute Value Types for details on the available options and how they work.
- Attribute name — The display name for the attribute that will be shown in Unify.
- API name — A unique identifier that will be used by developers when using the API. A suitable API name will be generated automatically, and typically there is no need to change it.
- Description — An optional description to be shown in Unify.
- Make attribute unique — Whether the values for this attribute should be distinct across records. If enabled, any attempt to create a record with a duplicate value will fail. This setting can be disabled later on.
- Make attribute required — Whether a value is required to create a record. If enabled, any attempt to create a record without a value for this attribute will fail. This setting can be disabled later on.